Sew a practical longsleeve for every season
A long sleeve is a real all-rounder – whether on cool fall days, crisp spring mornings, or even summer evenings during outdoor activities. With this free long-sleeve pattern for children, you can sew a cute long-sleeve with a collar or neckband that is comfortable and practical and accompanies the little ones through every season. Further sizes and sewing variations for this pattern can be found in the pattern construction kit “Kids Shirt Box” – until 31.12.2024 you even get a 20% discount on the pattern with the code SHIRTBOX20. So nothing stands in the way of your creative sewing fun!
You will need this:
- Free long-sleeve pattern for children
- 65 cm stretch fabric (e.g. cotton jersey, viscose jersey, wool jersey or French terry)
- Color-matching sewing thread / overlock thread
- Tailor’s chalk or trick marker
- Fabric scissors or rotary cutter with cutting mat
- Fabric clips and/or pins
- Sewing machine and optional overlock (serger) machine
- Printer, printer paper, scissors and adhesive tape for assembling the pattern
Prepare the pattern:
- Download the long sleeve pattern for children free of charge and open the PDF file with Adobe Acrobat Reader.
- Select only the required size in the layer menu.
- Print out the pattern in actual size. Check the 3×3 cm square to check the print scale.
- Cut the sides along the markings and glue them together accurately.
Cut to size:
- Iron your fabric carefully. Then, place all the pattern pieces on the fabric and secure them with sewing weights or pins. Pay attention to the grain and the direction of the fabric pattern. Transfer all markings (snips) to the pattern pieces using a removable trick marker or tailor’s chalk.
- Cut all pieces according to the instructions on the pattern pieces – the seam allowance is already included!
Important note on the collar: If you are using a less stretchy fabric such as firmer French terry or summer sweat, you may need to cut the collar at an angle to increase the stretch. Be sure to sew a test collar from your fabric and test whether it can be pulled over your child’s head easily before sewing it on.
Sewing instructions:
1. Prepare:
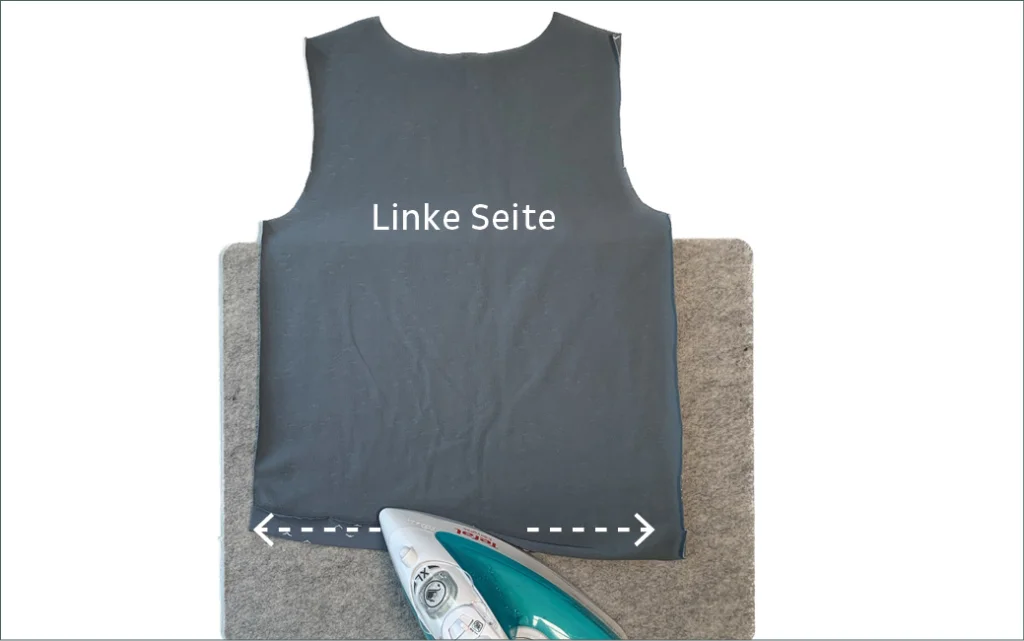
- Press the bottom hem edges of the front and back 2 cm inwards (to the wrong side of the fabric).
2. Close the shoulder seams:
- Place the front and back pieces together, right sides facing (= with the pretty sides facing). Pin the shoulder seams and sew them together with an elastic stitch. Press the seam allowance towards the back.
3. Insert the sleeves:
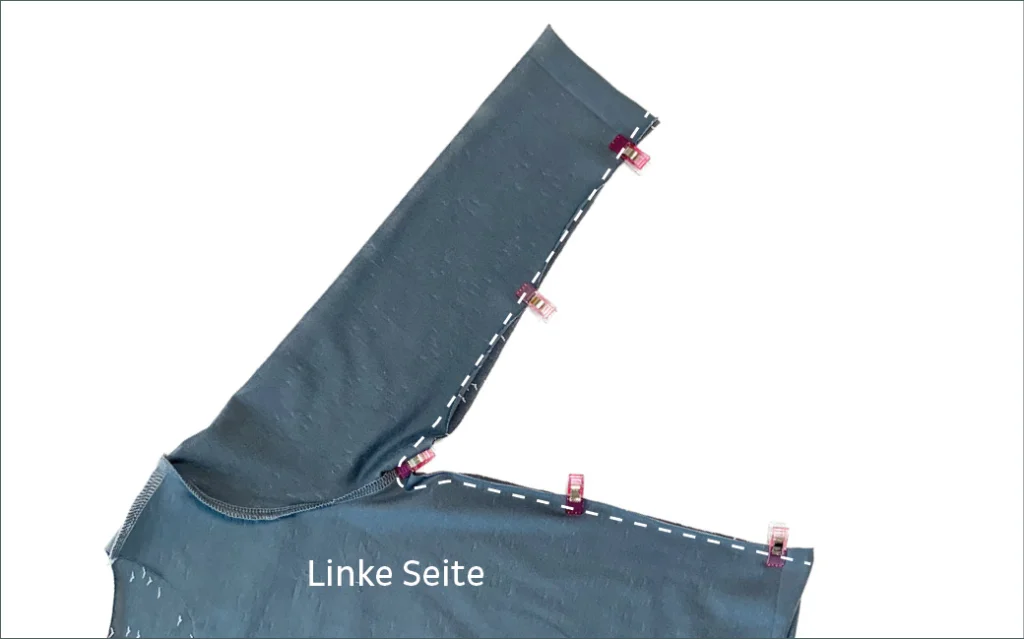
- Now unfold the shirt so that the right side of the fabric is on top and pin one sleeve to the armhole, right sides facing, using the snaps. The shoulder nick of the sleeve should match the shoulder seam exactly.
- Now sew on the sleeve with an elastic stitch and repeat the steps for the other sleeve.
4. Close the side seams:
- Fold the shirt right sides together. Fold out the pre-pressed hem edge again and close the side seams and sleeve seams on both sides.
5. Finish the hems:
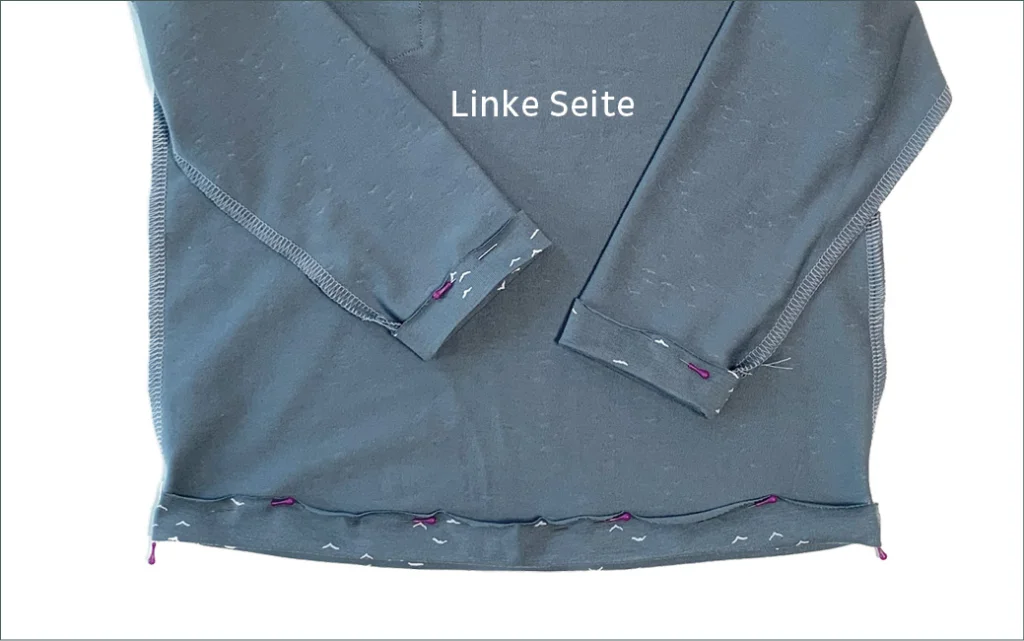
- Fold the pre-pressed hem of the shirt and the hem of the sleeves 2 cm to the wrong side of the fabric and pin the hems.
- Turn the shirt right side out and sew the hems all around at 1.5 cm intervals. Use an elastic stitch for this (e.g. zigzag stitch) or use a twin needle for stretchy fabrics.
6. sew the collar:
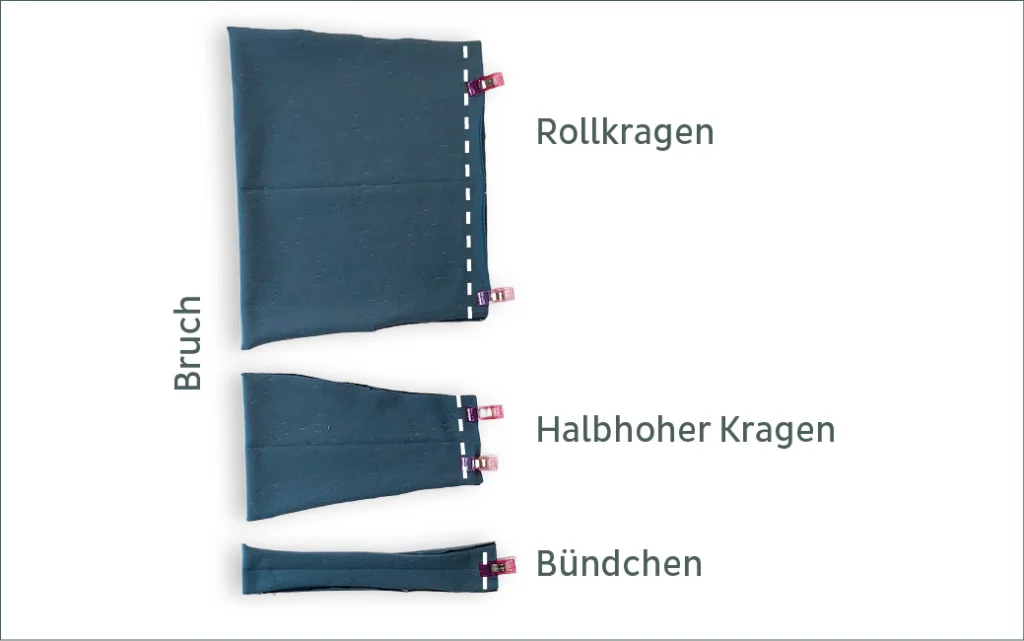
- The neckband and the half-up collar are sewn in exactly the same way, so they are not described in detail here. Just think of the half collar as a very wide cuff.
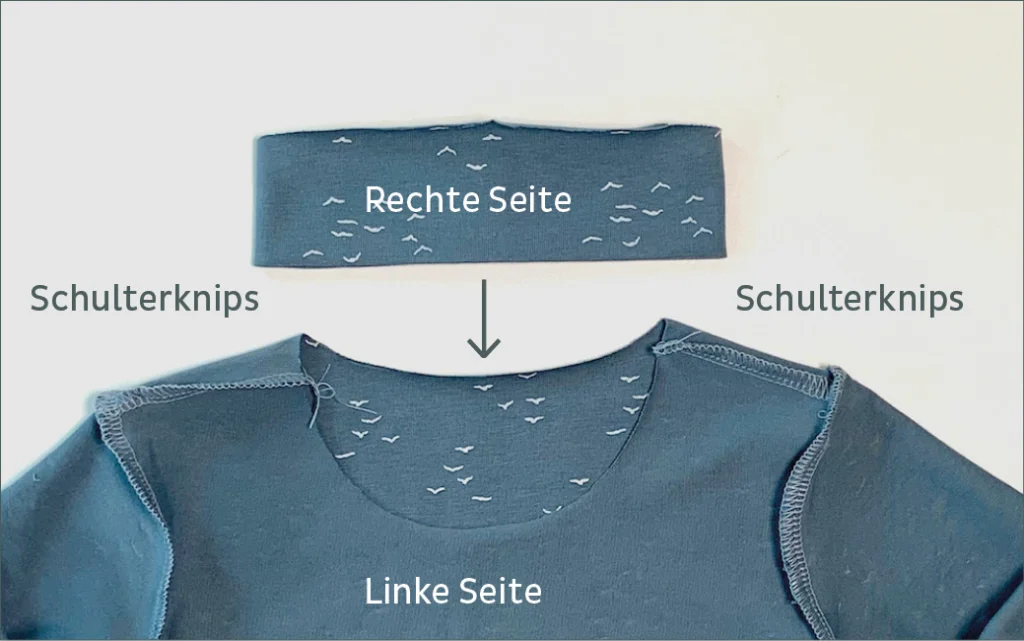
- Fold the neckband or collar right sides together at the fold and close it into a ring on the short open side using the sewing machine. Then press the seam allowances open.
- Then fold the neckband or collar closed to form a ring lengthwise, wrong sides together, and iron the folded edge.
- Turn the shirt inside out. Slide the cuff or collar into the neckline with the folded edge first. Pin in place so that the center back, center front and shoulder seam markings line up exactly.
- Sew on the cuff or collar all the way around. The neckline is wider than the collar, so you need to stretch the collar evenly when sewing it on. Make sure that the shirt is not stretched at the same time. Finally, press the neckline.
- If you like, topstitch the seam allowance of the neckline close to the edge all the way around. Use an elastic stitch or a twin needle that is suitable for stretchy fabrics.
Done! Your self-sewn long sleeve is ready for cozy winter days. More sizes and variations:
The “Kids Shirt Box” offers you even more sizes and many sewing variations! Until 31.12.2024 you get 20% discount with the code SHIRTBOX20! Go to the Kids Shirt Box here.








 Welcome to Creavision Lab! I’m Sonja, the designer and founder behind it all, with a passion for creating stylish DIY fashion through easy-to-follow sewing patterns. On my blog, you’ll find sewing tips, creative inspiration, and step-by-step tutorials to help you bring your own fashion projects to life – effortlessly and with lots of joy!